


Hey guys, I’m Pixel Pusher (Monions to some) and I’m here with my second RMT. As I mentioned in the first one I primarily lean toward balanced and bulky offensive types. I’ve been having some fun with more offensive types and wanted to see if there was a new, potentially balanced way, to build some of those types. This post will be about “Balanced” Bug; it looks crazy on paper but has a surprising synergy.

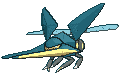
First I started with my standard Bug team. Volcarona and Heracross are staples that can’t be left out.
Next I wanted to look at how to balance out the team. The first point was dropping Pinsir and using Mega Scizor as my new physically defensive wall.
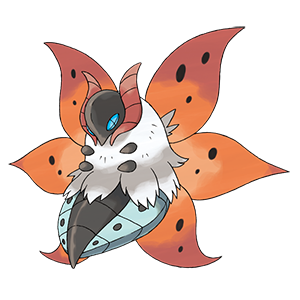
With an open spot, I now need my special defense wall. The clear and obvious choice here for Bug is Araquanid because of it’s high special defense and being a great switch-in to Fire attacks.
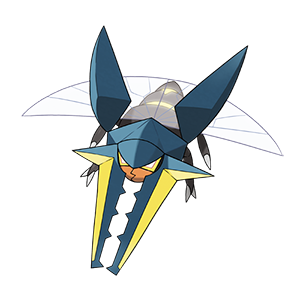
While slowing down the team I started to question if Sticky Webs or Galvantula as a whole were worth running. In order to fit a similar role coverage-wise and provide a Ground immunity with extra bulk, I chose to use Vikavolt instead.
With a pretty bulky team and a great switch-in to Fire moves, I wanted to try Forretress instead of Armaldo as my Rapid Spinner and Stealth Rock setter. Forretress works great as a pivot and adds extra physical Defense to the team.
With that, I had my new “Balanced” Bug team composition.
(Note: It did go through a few more iterations including swaps between Galvantula and Vikavolt multiple times)


Ability: Flame Body
EVs: 252 SpA / 4 SpD / 252 Spe
Timid Nature
IVs: 0 Atk


Moveset
For this team I kept the standard Quiver Dance set used by the vast majority of Volcaronas. Fire Blast is your strongest STAB and can break through a lot of bulkier walls and tanks just after one Special Attack boost, it also makes for a great nuke with Firium Z. Giga Drain helps with covering Ground and Water types while providing some marginal recovery. Hidden Power Ground is almost exclusively used to guarantee the full sweep of Steel-type teams in the mid-game once Heatran’s Air Balloon is popped.
Volcarona is the most flexible member of the team. I have gone through countless moveset changes trying to find the optimal set. What I have found is that there is no “perfect” Volcarona set, you can’t make one to cover all the types you may face. What this does provide is flexibility in customizing the team in order to target matchups either on ladder or in tournaments and keep your opponents guessing. Other move options are Hidden Power [Electric], Bug Buzz, or Psychic, along with other more niche techs.
In Battle
In battle Volcarona is typically a mid- to late-game sweeper. As mentioned above, you are looking for breaking any Sashes or Sturdy users and chip the team in general to help secure the full sweep. Volcarona on it’s own can win against Electric, Ground and even Water or Flying if you can get a clean switch in on the right Pokemon to set up against. Mantine is a hard wall that you need to trap with Araquanid.
Electric specifically is a hard matchup for Bug with Zeraora being able to almost single handedly run through the entire team. Bringing Volcarona in on Rotom or Zapdos (Ideally with 1 or no turns of Electric Terrain left) to set up is your win condition in this heavily unfavored matchup. A +2 Volcarona can usually sweep an entire Electric team or at least remove a large portion, enough to clean up with the rest of your team.

Ability: Moxie
EVs: 252 Atk / 4 SpD / 252 Spe
Jolly Nature


Moveset
Again, we are using a pretty standard set here. Heracross is Bug’s go-to Speed control. With a relatively good speed tier and the ability Moxie, Heracross can easily snowball into sweeps. Close Combat and Megahorn are your two primary STABs,both boasting very high base power coupled with Heracross’s already naturally high Attack stat. Stone Edge covers both Flying and Fire types, most notably Charizard Mega-Y. The last move, one some people see as an odd addition, is Pursuit. Pursuit is the primary way Bug can revenge kill some of the major threats such as Victini (Both Band and Scarf) and Specs Blacephalon. It does require you to sacrifice one team member, but in the long term, a 1 for 1 is not bad in order to remove a threat that could take out your entire team. With its strong offensive presence in the Steel match up you can also use Pursuit to pop Heatran’s Air Balloon on the switch out.
In Battle
As mentioned above, Heracross is your Speed control. Against slower and bulkier types, you’ll want to keep applying pressure with Heracross in order to chip down the opponent’s team for a late-game sweep with Volcarona or Scizor. Heracross partnered with Volcarona are a very strong combination of coverage and offensive pressure which can break a lot of type cores and set each other up for later game finishes.


Ability: Sturdy
EVs: 248 HP / 252 Def / 8 SpD
Bold Nature
IVs: 0 Atk


Moveset
Forretress acts as a second defensive wall in the late-game, after Red Card is used up. For the best longevity I used a fully defensive spread. This way Forretress can survive most, if not all, attacks from opponents who managed to set up on you and force them out with Red Card. The two primary threats that Forretress helps relieve pressure from are Autotomize Celesteela and Z Kommo-o. For obvious reasons, Celesteela at +2 Speed with Air Slash and Flamethrower coverage is a death sentence to Bug. This team is prepared for such threats, but if things do not go my way Forretress acts as the hidden card up my sleeve. (Pause for boos)
Stealth Rock and Rapid Spin are staples in order to set up your hazards and keep Stealth Rock off your own side, especially considering how quickly the damage can rack up against Bug. I usually see Toxic Spikes or Spikes as an inclusion on Forretress sets on more offensive builds, but I opted to use Toxic to help Forretress break slower hazard setters and clearers. Lastly, Volt Switch provides great momentum considering how passive this set is.
In Battle
Because this team is slower than a standard Bug team, setting up hazards in the early game isn’t as high of a priority. Using Red Card as your item, I want to make sure to keep that for later in the game so Forretress is almost never going to be your lead. Post-Red Card use Forretress can come in more freely to set and clear hazards. This is where the addition of Toxic shines. Often I found myself in stalemates against Defoggers/Rapid Spinners or slower hazard setters. With Toxic you can poison them then return to clicking Stealth Rock or Rapid Spin respectively.
After setting or clearing hazards, being able to Volt Switch and start applying offensive pressure is key to winning with this team. A secondary benefit is coming in with Sturdy intact against a set up opponent and Volt Switching out after the Red Card activation for a huge momentum shift.


Ability: Water Bubble
EVs: 248 HP / 188 SpD / 72 Spe
Calm Nature
IVs: 0 Atk


Moveset
Araquanid acts as your main Special Defense wall. Because of that I am using near full investment into bulk. 248 HP means you take 24% from Stealth Rock on entry and still gain 7% per turn from Leftovers. 72 Speed allows you to outspeed Chanseys and other slower walls such as Ferrothorn, Cradily, Hippowdon, Toxapex and Torkoal.
The entire moveset has one purpose; trap and kill walls. Spider Web traps the opponent and Soak changes their type to Water. From there you Toxic and stall them out using Rest for recovery. With proper predictions Araquanid can also wall physical Fire attacks that threaten your two other walls that both take x4 damage from Fire.
In Battle
Araquanid plays a multitude of roles depending on the match up. This is your main Fire-type move switch in. For instance, Araquanid can avoid a 3HKO from Mega Charizard Y’s Fire Blast in the sun, which, assuming they stay in, allows you to Toxic and Rest to stall out the damage. Most common targets for this set are things like Chasey, Toxapex, Venusaur, Defensive Celesteela builds, Mantine and other walls that are hard to break in conjunction with opposing support. By breaking these walls, you set up the late-game sweep for Volcarona, Heracross or Scizor.
A secondary use for the set is to lower the damage output from opposing threats by removing their STAB by changing their type to Water. This way you can make safer switch-ins to your checks and counters for things like Garchomp, Autotomize Celesteela and more.
252 SpA Charizard-Mega-Y Fire Blast vs. 248 HP / 188+ SpD Water Bubble Araquanid in Sun: 99-117 (29.2 - 34.5%) -- 99.7% chance to 4HKO after Leftovers recovery
252 SpA Flash Fire Heatran Magma Storm vs. 248 HP / 188+ SpD Water Bubble Araquanid: 76-91 (22.4 - 26.8%) -- guaranteed 4HKO after Leftovers recovery and trapping damage
252+ Atk Choice Band Dragonite Fire Punch vs. 248 HP / 0 Def Water Bubble Araquanid: 74-88 (21.8 - 25.9%) -- possible 5HKO after Leftovers recovery
252+ Atk Choice Band Huge Power Diggersby Fire Punch vs. 248 HP / 0 Def Water Bubble Araquanid: 85-101 (25 - 29.7%) -- guaranteed 5HKO after Leftovers recovery

Ability: Levitate
EVs: 248 HP / 100 SpA / 76 SpD / 84 Spe
Calm Nature
IVs: 0 Atk

Moveset
Originally, when I built the team, I was using a full Special Attack and Speed set with Agility, Thunderbolt, Energy Ball, and Hidden Power Ice with Metronome as the item. I ran into issues with being too slow and too fragile so I switched to Galvantula with Expert Belt for similar coverage but better speed. After more play testing I found some threats to this team that could still outspeed Galvantula so with some help I came up with this new Vikavolt set instead.
The moveset is standard coverage which can demolish Water, Ground and put a good dent into Flying teams with Volt Switch to pivot. I was at a loss for what item to use, so to enhance bulk and help to bluff a Choice item (Plus it’s one of my favorite items in the game) I decided on using an Assault Vest instead.
248 HP provides maximum health while taking minimal damage from Stealth Rock. 84 Speed allows you to outspeed the same threats listed above with Araquanid in addition to defensive Swamperts and Tyranitars. Max health and 76 Special Defense EVs with a Calm nature allows you to survive a wide range of hits from threats such as Mega Pidgeot, Pelipper, Mega Pinsir, Tapu Koko and more. The remaining EVs were put into Special Attack to deal as much damage as possible.
In Battle
Vikavolt is a strong tool for taking out some slower and more coverage-based opponents. This is the primary way of dealing with Celesteela, especially when you can’t figure out if it’s a defensive or an offensive build. With BoltBeam + Energy Ball coverage, Vikavolt can hit most of Bug’s primary threats for super effective damage and survive any attack in the process. Vikavolt is a great lead to scout and pivot at the start of the match, due to its ability to force switches and pivot out with a slow, powerful Volt Switch.
Damage Taken:
252 SpA Pidgeot-Mega Hurricane vs. 248 HP / 76+ SpD Assault Vest Vikavolt: 130-154 (36.4 - 43.1%) -- guaranteed 3HKO
252 SpA Pidgeot-Mega Heat Wave vs. 248 HP / 76+ SpD Assault Vest Vikavolt: 150-178 (42 - 49.8%) -- guaranteed 3HKO
252 SpA Choice Specs Pelipper Hurricane vs. 248 HP / 76+ SpD Assault Vest Vikavolt: 153-180 (42.8 - 50.4%) -- 1.2% chance to 2HKO
252+ SpA Celesteela Air Slash vs. 248 HP / 76+ SpD Assault Vest Vikavolt: 84-99 (23.5 - 27.7%) -- 76.8% chance to 4HKO
252 SpA Celesteela Flamethrower vs. 248 HP / 76+ SpD Assault Vest Vikavolt: 122-144 (34.1 - 40.3%) -- guaranteed 3HKO
252+ Atk Swampert-Mega Waterfall vs. 248 HP / 0 Def Vikavolt in Rain: 262-310 (73.3 - 86.8%) -- 96.9% chance to 2HKO
252 SpA Choice Specs Tapu Koko Thunderbolt vs. 248 HP / 76+ SpD Assault Vest Vikavolt in Electric Terrain: 93-111 (26 - 31%) -- guaranteed 4HKO
+2 252+ SpA Raichu-Alola Stoked Sparksurfer vs. 248 HP / 76+ SpD Assault Vest Vikavolt in Electric Terrain: 265-312 (74.2 - 87.3%) -- guaranteed 2HKO
252 Atk Choice Band Zeraora Plasma Fists vs. 248 HP / 0 Def Vikavolt in Electric Terrain: 181-213 (50.7 - 59.6%) -- guaranteed 2HKO
252 Atk Aerilate Pinsir-Mega Return vs. 248 HP / 0 Def Vikavolt: 249-294 (69.7 - 82.3%) -- guaranteed 2HKO
252 Atk Landorus-Therian Stone Edge vs. 248 HP / 0 Def Vikavolt: 260-306 (72.8 - 85.7%) -- guaranteed 2HKO
Damage Dealt:
100 SpA Vikavolt Thunderbolt vs. 0 HP / 4 SpD Pidgeot-Mega: 348-410 (113.3 - 133.5%) -- guaranteed OHKO
100 SpA Vikavolt Thunderbolt vs. 252 HP / 96 SpD Celesteela: 260-308 (65.3 - 77.3%) -- guaranteed 2HKO after Leftovers recovery
100 SpA Vikavolt Thunderbolt vs. 0 HP / 0 SpD Celesteela: 288-342 (85.9 - 102%) -- 6.3% chance to OHKO after Leftovers recovery
100 SpA Vikavolt Energy Ball vs. 0 HP / 4 SpD Swampert-Mega: 356-420 (104.3 - 123.1%) -- guaranteed OHKO
100 SpA Vikavolt Energy Ball vs. 252 HP / 4 SpD Swampert: 420-496 (103.9 - 122.7%) -- guaranteed OHKO
100 SpA Vikavolt Thunderbolt vs. 0 HP / 4 SpD Pinsir-Mega: 314-372 (115.8 - 137.2%) -- guaranteed OHKO
100 SpA Vikavolt Energy Ball vs. 252 HP / 4 SpD Hippowdon: 252-298 (60 - 70.9%) -- guaranteed 2HKO after Leftovers recovery
100 SpA Vikavolt Thunderbolt vs. 252 HP / 4 SpD Toxapex: 216-254 (71 - 83.5%) -- guaranteed 2HKO after Black Sludge recovery
100 SpA Vikavolt Hidden Power Ice vs. 0 HP / 4 SpD Landorus-Therian: 312-368 (97.8 - 115.3%) -- 87.5% chance to OHKO
100 SpA Vikavolt Hidden Power Ice vs. 0 HP / 0 SpD Garchomp: 292-348 (81.7 - 97.4%) -- guaranteed 2HKO
100 SpA Vikavolt Hidden Power Ice vs. 244 HP / 124 SpD Gliscor: 280-332 (79.5 - 94.3%) -- guaranteed 2HKO after Poison Heal

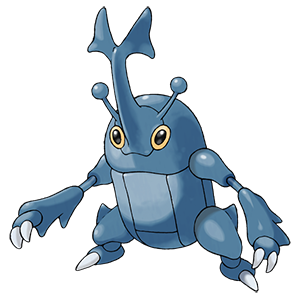
Ability: Technician
EVs: 248 HP / 48 Def / 212 SpD
Impish Nature


Moveset
Scizor acts as your main defensive wall before the Red Card is used on Forretress. 248 HP maximizes health and minimizes Stealth Rock damage. With 48 Defense EVs and a beneficial nature you secure survival against 2HKOs from threats like Mega Lopunny and Terrakion. The remaining EVs go into Special Defense to survive common, weaker, HP Fires and other special attacks. Curse boosts both Attack and Defense at the cost of Speed, allowing Scizor to act as a late-game win condition. Bullet Punch takes advantage of Scizor’s Technician along with STAB, boasting high damage output despite a low base power. Because Bullet Punch has +1 priority, it essentially nullifies the Speed drops from Curse. The odd move on the set is Defog. Typically you’ll see U-Turn or even Facade. While testing I found myself using Bullet Punch the vast majority of the time so with Scizor’s natural bulk, high pressure presence and the major threat Hazards play against this team, I added Defog.
In Battle
In battle you’ll want to get Scizor Mega evolved as soon as possible so you can get your defenses up. Scizor can be used as a surprise Defogger and helps taking out popular suicide leads such as Aerodactyl and Smeargle that try to set up hazards quickly. With Bullet Punch’s priority you can 2HKO them before they reset hazards. You’ll always want to preserve Scizor if possible. Since Heracross and Volcarona can be dealt with easily by some types, Scizor is the surprise end game sweeper after the opposing team has been chipped. Curse combined with early game chip can allow Scizor to sweep types like Ground, Dragon, and almost any other type that doesn’t resist Steel.

Generally speaking, the main threats against this team are strong physical Fire attackers like Victini and Charizard Mega X and Flying STAB users like Mega Pinsir, Mega-Pidgeot and Pelipper. Like most other balanced builds, set up attackers can be used to break your core and ultimately beat this team. For example: Kommo-o with strong STAB and Fire coverage, Celesteela with both Flying and Fire coverage or Double Dance Landorus or Terrakions.
Though they aren’t strictly a conventional “threat” to the team, fast Taunt users and phasers can cause you to lose almost all momentum if you get caught off guard. Phasers can cause issues in combination with strong defensive cores to keep your set up attackers at bay. Flying and balanced Water are two types that excel at this so you need to carefully deconstruct their cores by taking advantage of your unique movesets and by making strong predictions.
Below you can find a list of specific threats per type:
N/A


Hazard(s): Stealth Rock

From what I expected this team to turn out like and what it actually became, I was surprisingly pleased. On a personal level, I tend to get much better results with this balanced team variant than I do with an offensive one. As it pertains to this team vs. a standard more offensive one, they have their better and worse matchups, but by balancing the team out you can target and secure different matchups more efficiently. Hyper offensive teams rely heavily on set ups and predictions more so than a balanced team build looking to wear the opponent down. This team is not only a fun team to try out but much more effective than it looks on paper. With some more research into this build it could rival a standard Bug team for “most ideal” but considering how long standard Bug has been standard, that may not be the case. Either way, I hope you all enjoyed the read, will enjoy the team and let me know what you think of it!


Huge shoutout to Mateeus for helping play test, gather replays, think of new set ideas and tweak the team to what it’s become. He also helped QC the post along with the wonderful Brooke and Diagnostic. Also a thanks to Vodoom for helping me get the base. Thanks to everyone else who helped out as well with battling, replays, and everything else.

Volcarona @ Firium Z
Ability: Flame Body
EVs: 252 SpA / 4 SpD / 252 Spe
Timid Nature
IVs: 0 Atk
- Quiver Dance
- Fire Blast
- Giga Drain
- Hidden Power [Ground]
Heracross @ Choice Scarf
Ability: Moxie
EVs: 252 Atk / 4 SpD / 252 Spe
Jolly Nature
- Close Combat
- Stone Edge
- Pursuit
- Megahorn
Forretress @ Red Card
Ability: Sturdy
EVs: 248 HP / 252 Def / 8 SpD
Bold Nature
IVs: 0 Atk
- Toxic
- Stealth Rock
- Rapid Spin
- Volt Switch
Araquanid @ Leftovers
Ability: Water Bubble
EVs: 248 HP / 188 SpD / 72 Spe
Calm Nature
IVs: 0 Atk
- Soak
- Toxic
- Spider Web
- Rest
Vikavolt @ Assault Vest
Ability: Levitate
EVs: 248 HP / 100 SpA / 76 SpD / 84 Spe
Calm Nature
IVs: 0 Atk
- Thunderbolt
- Energy Ball
- Hidden Power [Ice]
- Volt Switch
Scizor-Mega @ Scizorite
Ability: Light Metal
EVs: 248 HP / 48 Def / 212 SpD
Impish Nature
- Bullet Punch
- Curse
- Roost
- Defog
Last edited by a moderator:


